
Mutton Curry for Dummies
Confession
Despite all the hullabaloo behind me cooking a rare mutton curry to delight the taste-buds, I would have to stop beating behind the bush and thank my Mom for teaching me all that I know, and I know very little, about cookery. Sure, I have no right to boast about my culinary skills, but I can make a decent mutton/chicken gravy to subdue the hunger-induced inferno for a while.
This is a rather simple and straightforward technique that I have honed after many unsuccessful attempts. So, let’s cut through all the chatter and cook some damn mutton! Here we go.
If you’re having a bad day, then a good mutton-curry will wash your pain away.
Khasi Dhamala
Ingredients
To begin with, I have one more thing to confess. I never mix my ingredients in exact measurements. At the beginning, it was more of trial and error but now I’ve reached the state where I can roughly estimate how many onions would go in the dish without having to look it up in the Internet.
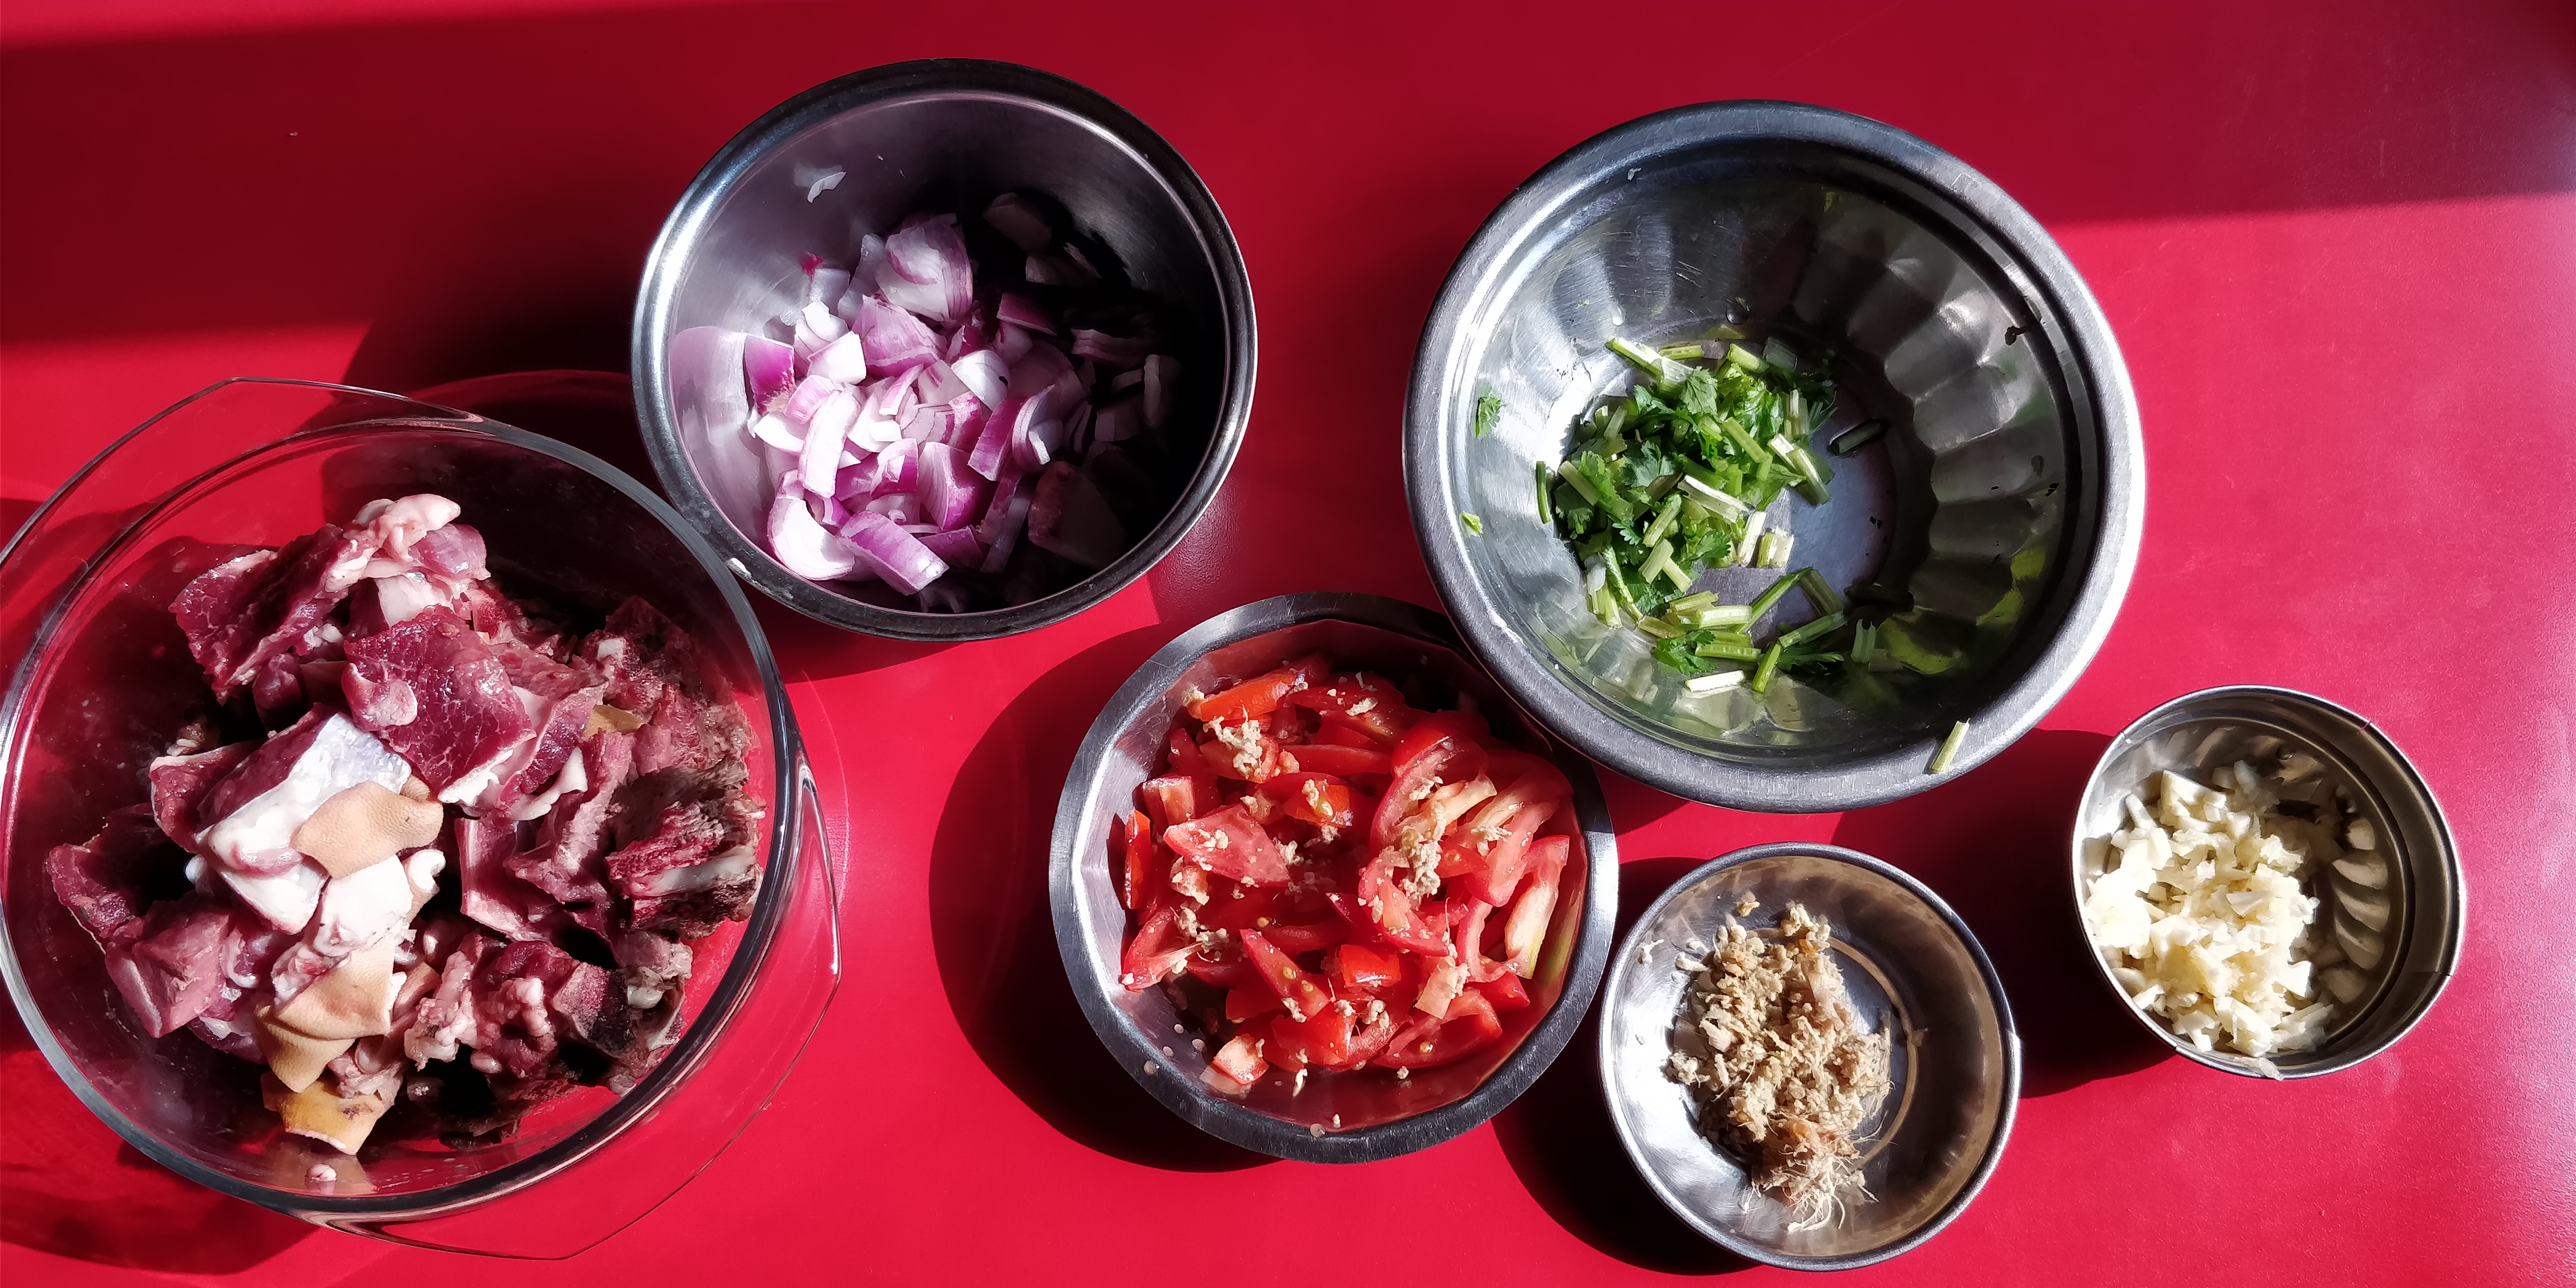
So, here are the stuffs that I used which was enough for 4 servings:

- 1/2 kg of mutton
- 2 medium-sized onions
- 4 medium-sized tomatoes
- A full garlic
- A little bit of ginger [Refer to the figure above]
- Tori ko Tel (Mustard Oil - But any cooking oil would do)
- Finely cut Dhaniya (Coriander) [Again, refer to the figure for an estimation]
- Jeera (Cumin Powder)
- Garam Masala (Hot Spices)
- Besaar powder (Turmeric Powder)
- Dhaniya Powder (Coriander Powder)
- Salt as per the taste
Procedure
The process that I’ve followed here is really basic and this can be applied to cooking almost any other meat item, specially chicken or fish.
Frying Those Onions Well
You can use a pressure cooker or a saucepan or any other suitable dish depending upon the availability.
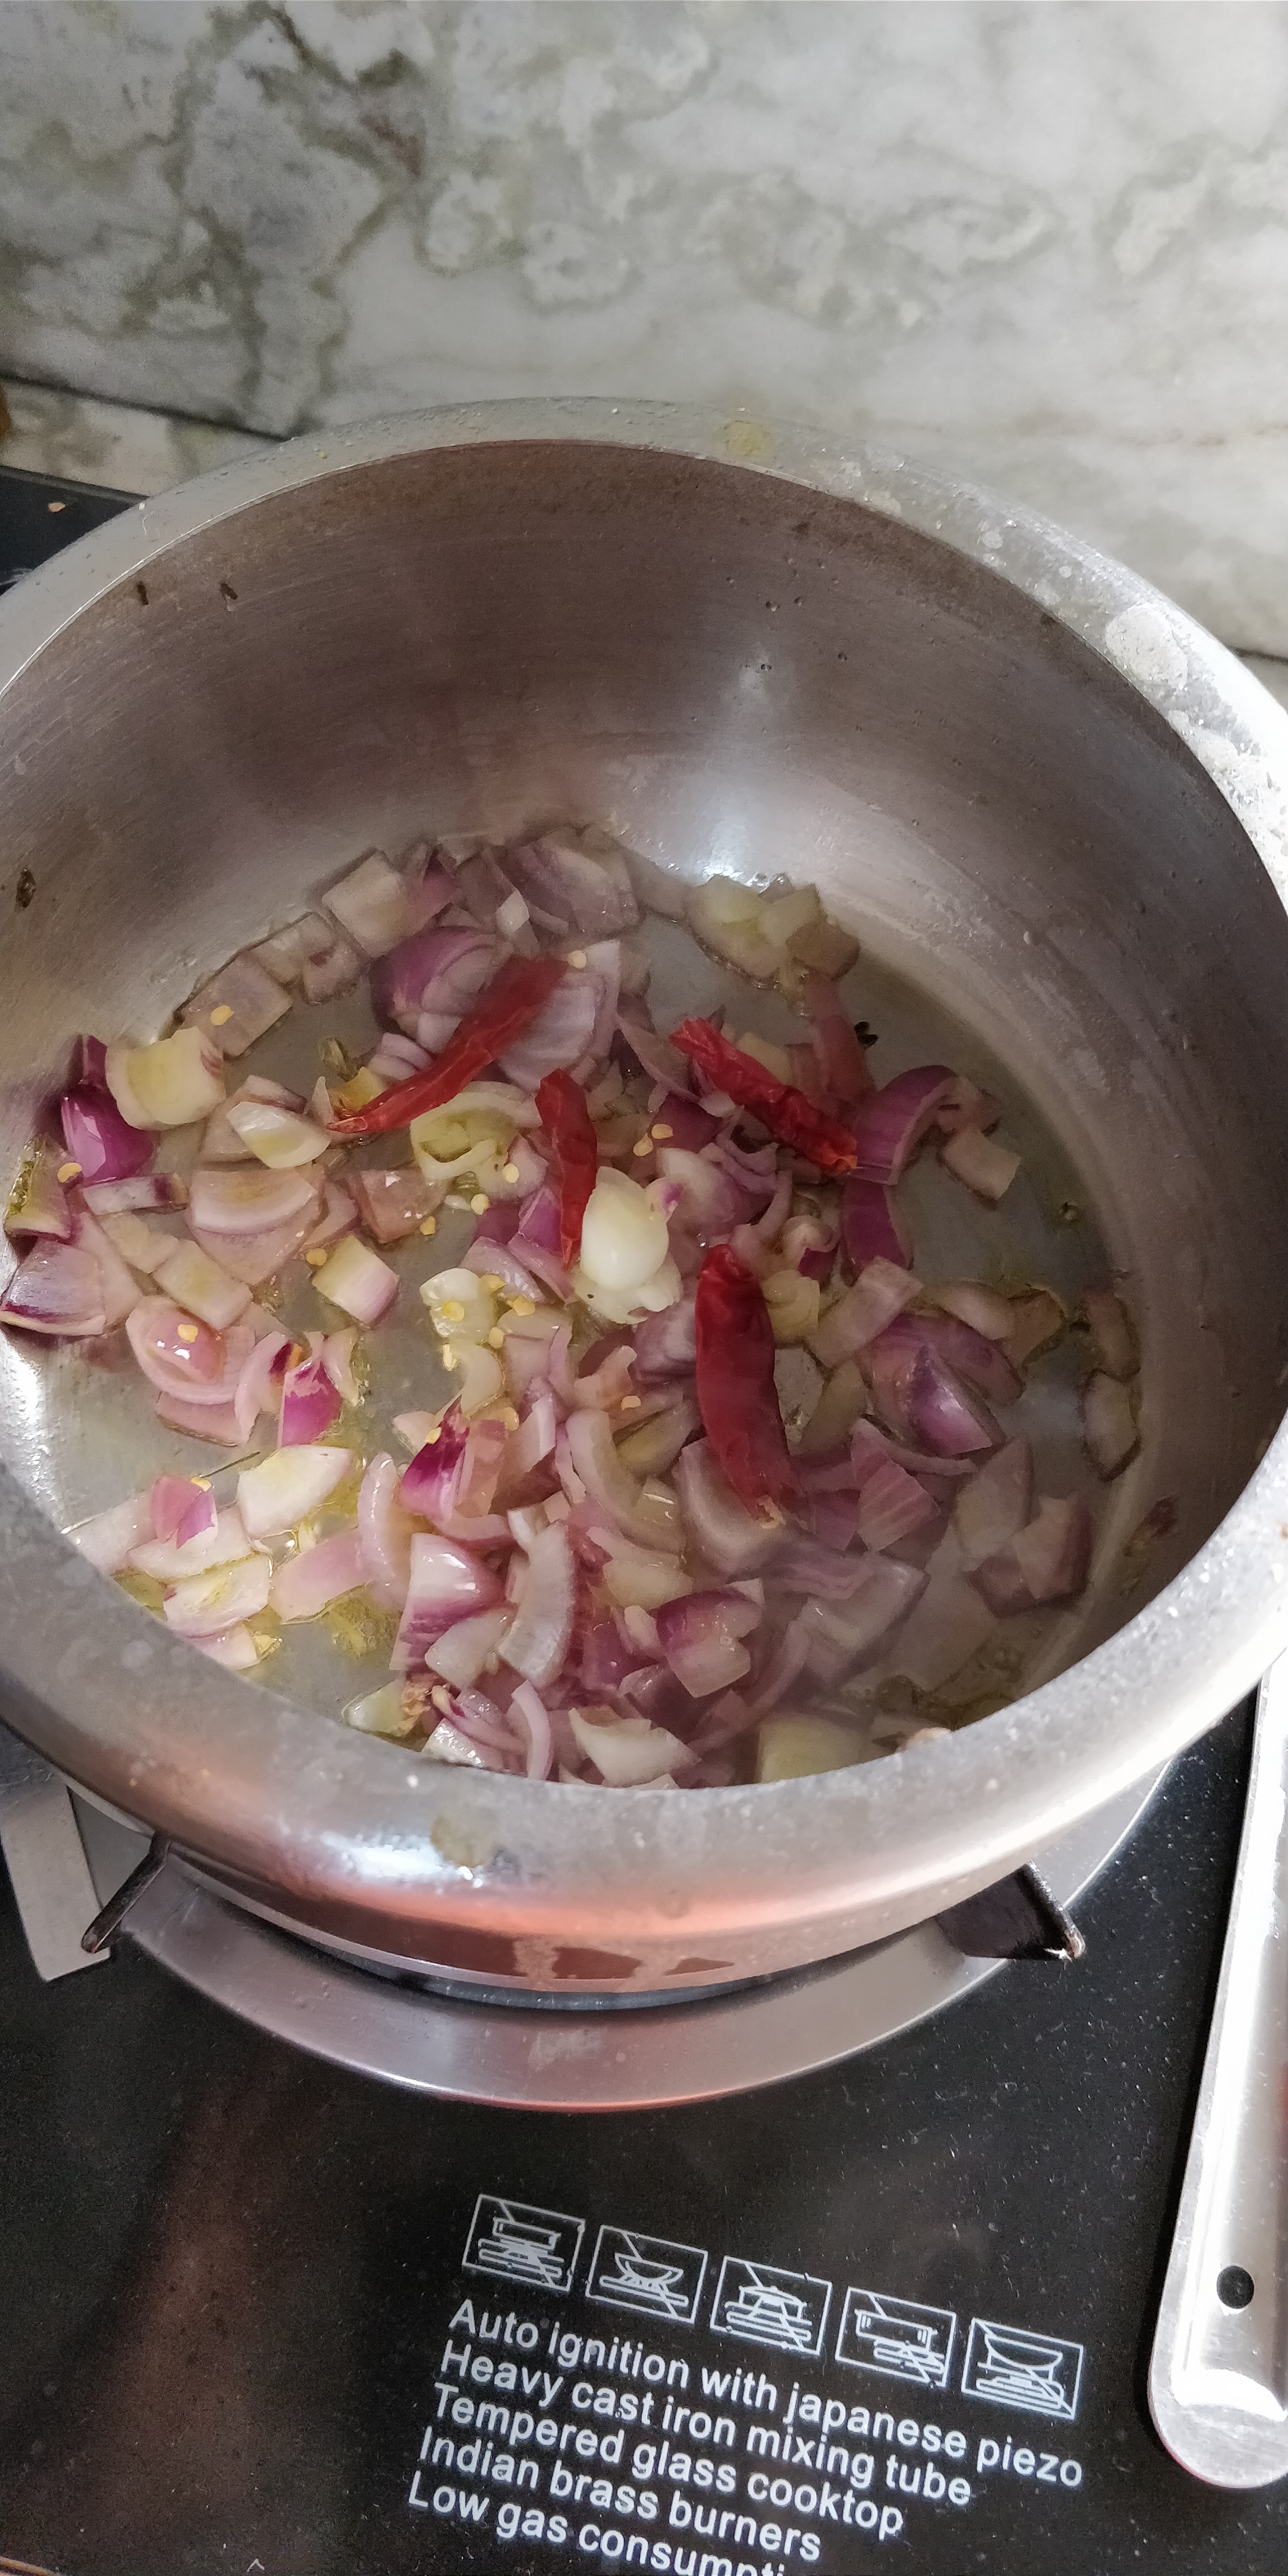
Pour a little oil in the dish and set the heat to medium. Be careful not to overheat the oil as it can quickly burn the ingredients or burn the base of the vessel.
After the oil has heated, pour in the chopped onions. Slowly stir the onions and 5 minutes and let it change it’s color to a beautiful golden brown. That’s your signal to pour in the meat.
Tip No. 1
While it’s always better to have all of the ingredients ready beforehand, if you’re in a hurry, you can quickly chop the tomatoes and grate the garlic and ginger to form a thick paste while the onions are getting fried. Remember to keep stirring the onions in the cooker though!
Pour in the Meat and Wait for the Moment
Next step is to put the meat in the dish. Now, it may be tempting to keep on stirring the meat but the magic is in the constant supply of low heat and allowing the meat to settle down and release it’s fatty oils. Allow the meat to get fried in it’s own oil. Grated garlic and ginger paste along with Jeera, Besaar and Dhaniya powders can be mixed during halfway through the cooking. You can even put in some dried chillies or chilly powder if you want your curry to be spicy. It might take upto 10-15 minutes for the meat to get fried depending upon the quantity of the meat. The color will change to give a richer golden-brownish color showing that the meat is now fried.


Tip No. 2
The spices can be put as soon as the meat is poured in for frying but I would not suggest that. Experience shows that if these mixtures are added too early in the process, then they tend to get stuck at the base of the pan and eventually burn.
Also remember, Garam Masala should be added only towards the end of the cooking and not now.
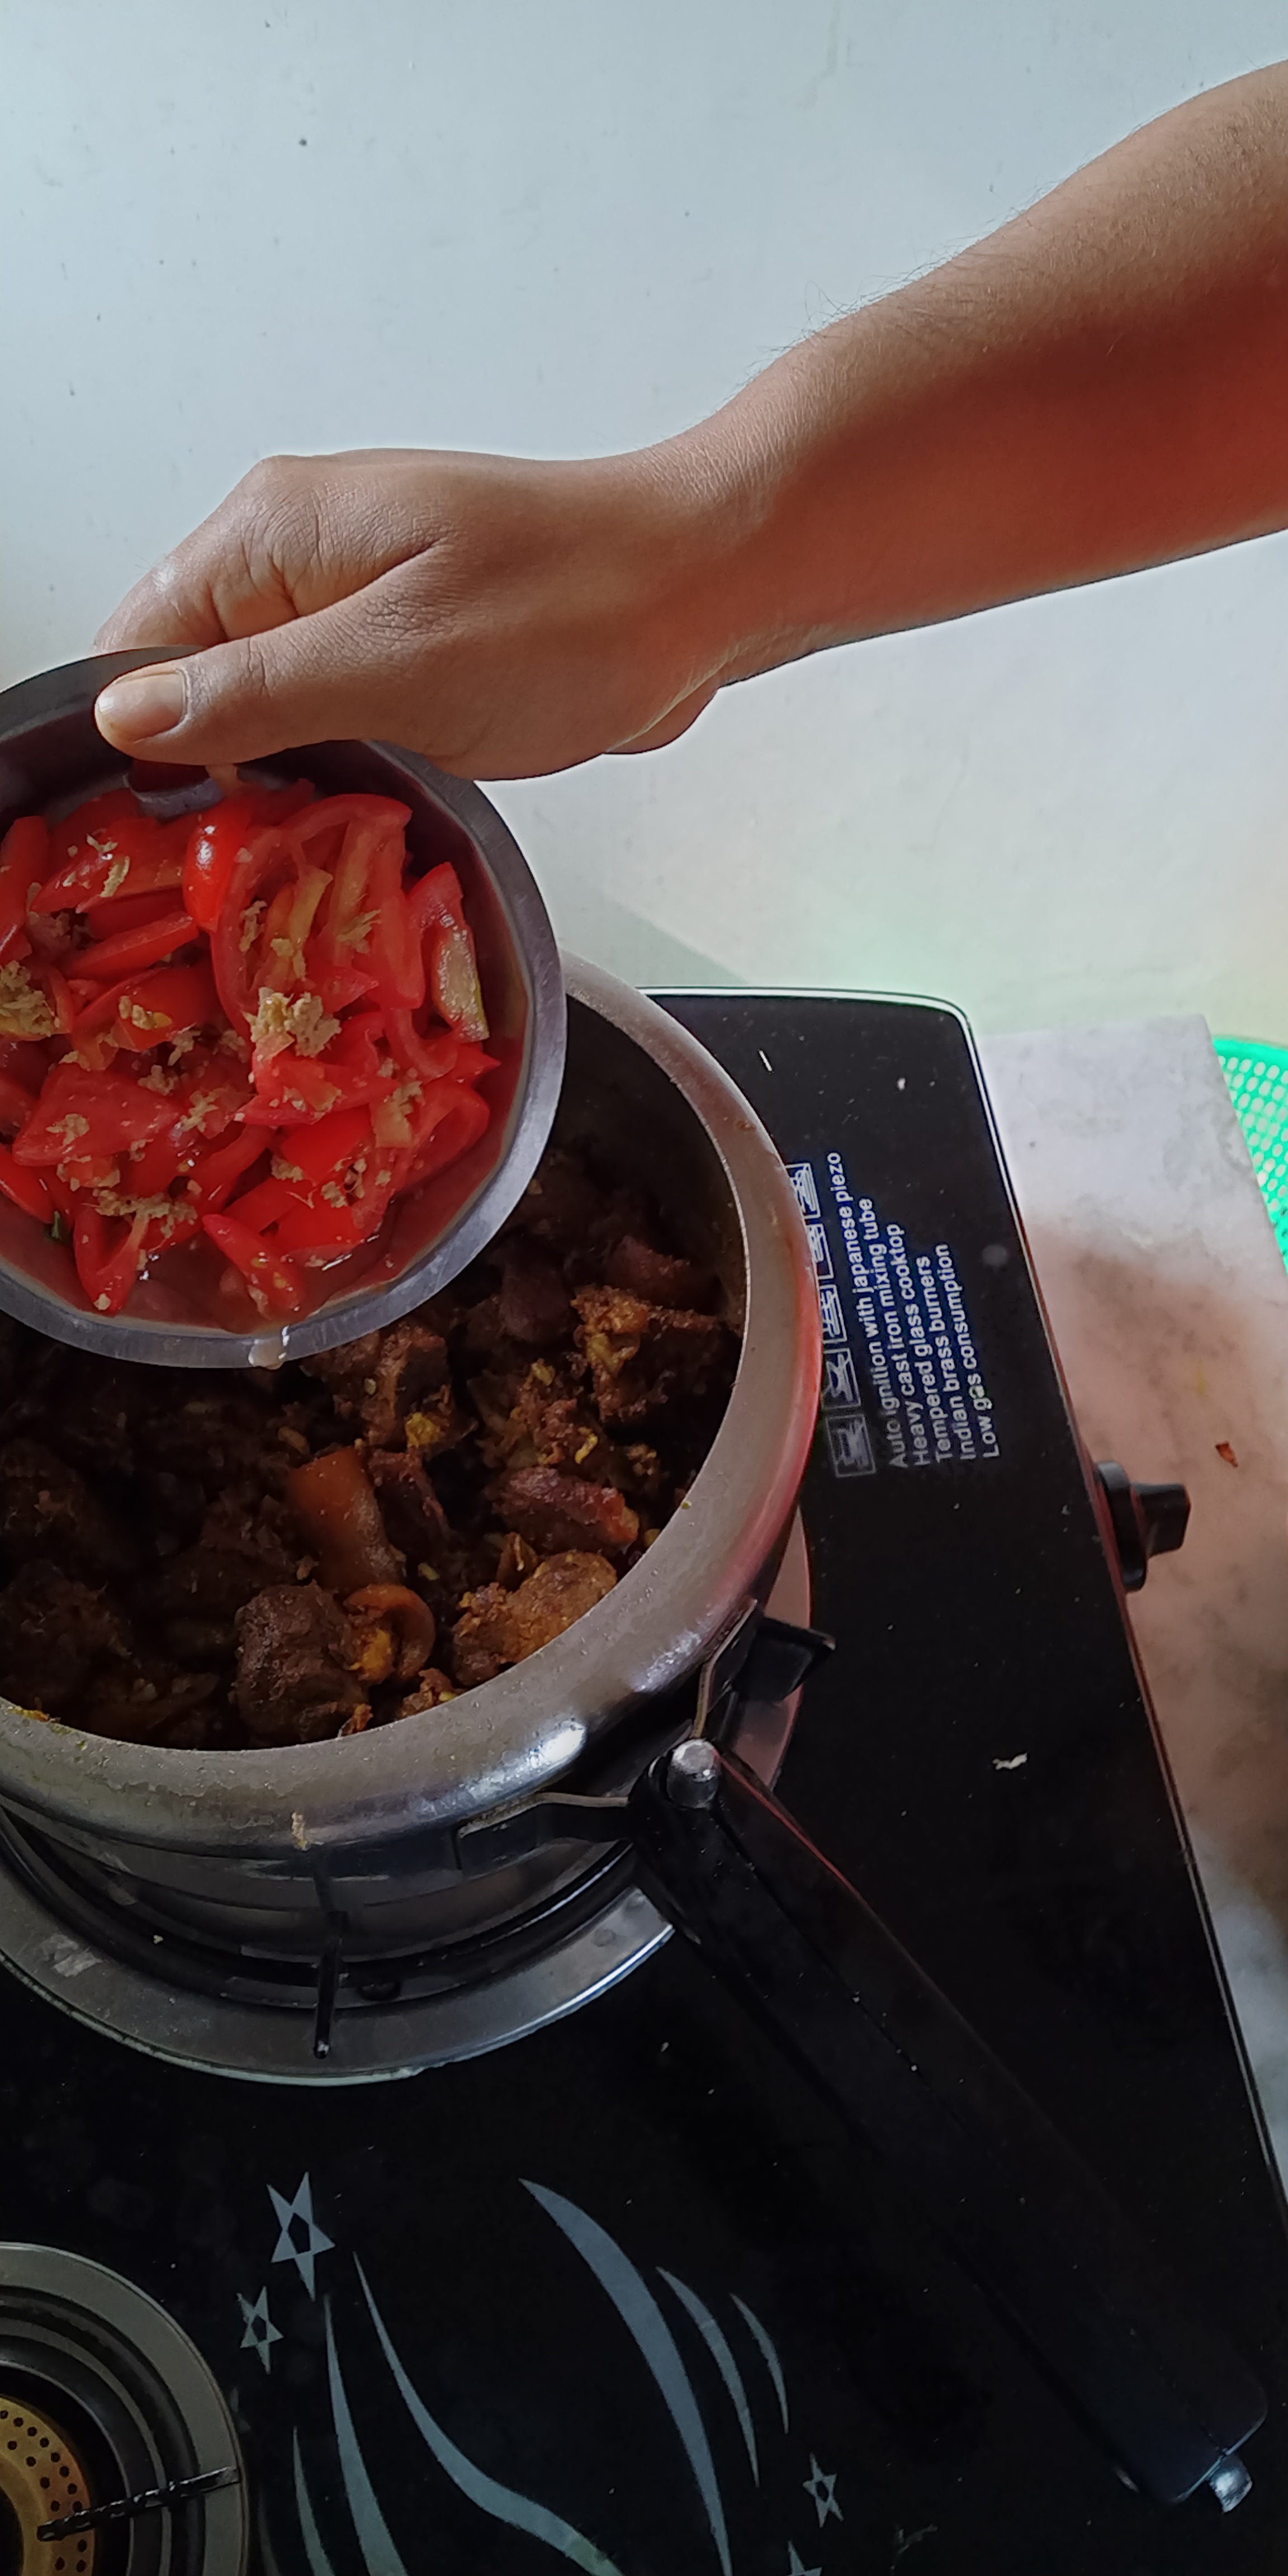
To Gravy or Not to Gravy
So far so good, eh? We are approaching towards the end of this adventure. Too soon right, yeah, I know. We were just starting to have some fun. Well, hold on to your horses because the show isn’t over yet. But wait a minute, the meat is fried and you can really smell that delectable aroma of all sorts of spices. Surely, you can quickly pop a piece and savour the fruits of your labor right? Well, no again. The meat might look as if it’s ready to serve, but if you do, then be ready for some big-time embarrassment. Had it been chicken that we’re cooking, then you might be right. But its, mutton we’re dealing with here. It’s more firmer variant of meat and has a higher amount of fiber which demands further slow-cooking for it to be tender and softer. What I normally do is put the lid on the pressure cooker and let it cook for a good 7-8 minutes, which is roughly about 5-6 whistles.

By the way, this is Homo Deus by Yuval Noah Harari. Good book indeed.
But the question remains. Do you want the mutton to have a thick gravy, or a lighter one? Or rather, no gravy at all. Well, depending on that, you put in the tomatoes. Put in the tomatoes in the vessel and wait for them to tenderize the meat a little with its moisture. You may add 1-2 cups of water or even more depending upon your palate. Put the lid on and set the flame to low. Wait for 5-6 whistles.
Once the meat has completely cooked, open the lid and add two teaspoon of Garam Masala and let it cook on medium flame for another 5 minutes.
Tip No. 3
If you’re using a pressure cooker, then be sure to fill a quarter of the vessel with water. Otherwise, there is a chance of the meat getting burnt. Also, after 5-6 whistles, check whether the meat has cooked completely or not. If not, add a little more water and close the lid again and let it whistle out for another 2 whistles. Check again. Repeat.
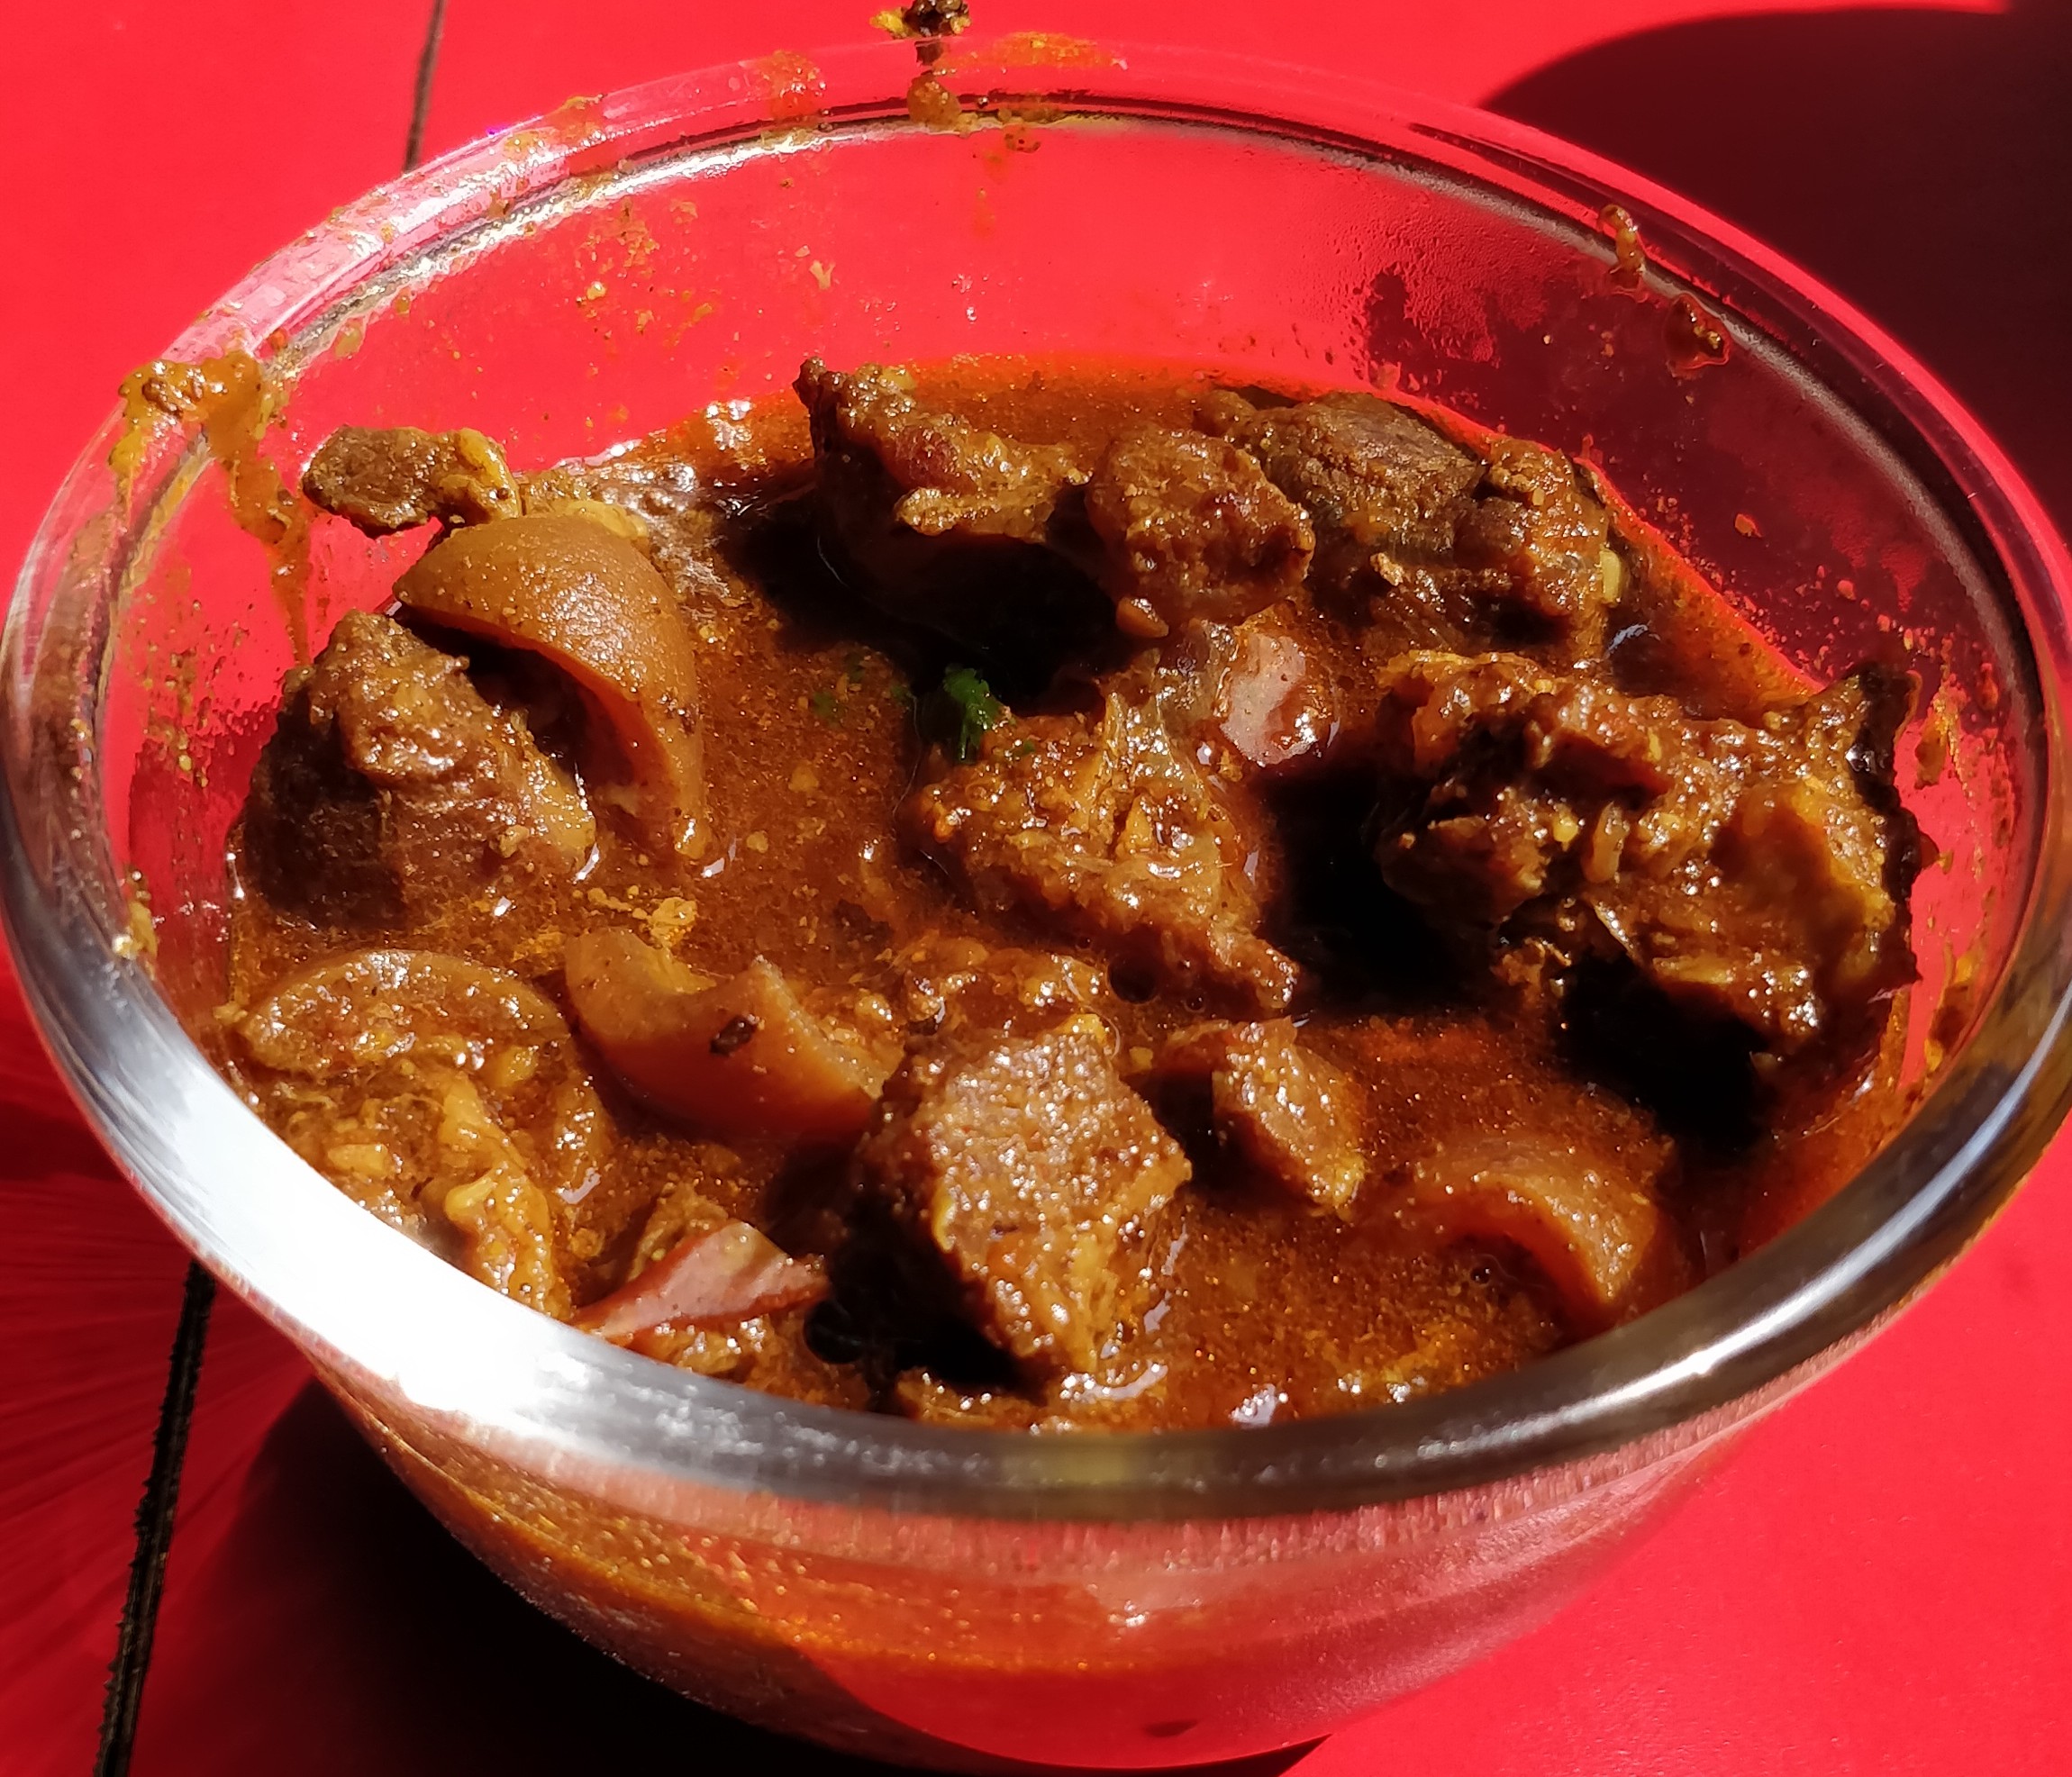
Serve and Enjoy
Voila! If everything went well, you now have yourself a mutton curry ready to be a part of your meal. Best enjoyed with Bhaat (Rice) or Roti.
There are a number of different ways to cook mutton. This is just one of those ways. Like I confessed before, I am not a chef and there have been times when the food that I’d cooked had tasted worse than rubber. But, I’ve lived and learned.
Hope you’ve enjoyed this. Stay blessed!


Leave a Comment